Mould thrives in environments with excess moisture, poor ventilation, and high humidity. Identifying the root causes of mould growth is the first step toward effectively addressing the problem. By understanding where mould develops, why it occurs, and how to eliminate it, you can create a cleaner, safer indoor environment.
Common Causes of Moisture Problems Indoors
- Leaking roofs or pipes: Water seeping through damaged roofs or faulty plumbing creates the perfect breeding ground for mould.
- Poor ventilation: Spaces without proper airflow—such as bathrooms, basements, or attics—tend to trap humidity.
- Condensation: Cold surfaces like windows or poorly insulated walls may accumulate moisture due to temperature fluctuations.
- Flooding or water damage: Even after initial cleanup from floods or leaks, residual dampness often leads to mould growth.
Identifying these sources early can prevent further damage and reduce the likelihood of recurring issues.
Signs of Mould Growth Indoors
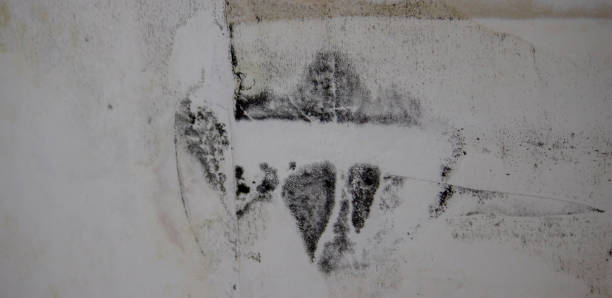
- Visible dark spots or discoloration: Mould often appears as black, green, yellow, or even white patches on walls, ceilings, or floors.
- Musty odors: A persistent earthy smell is often a sign of hidden mould colonies.
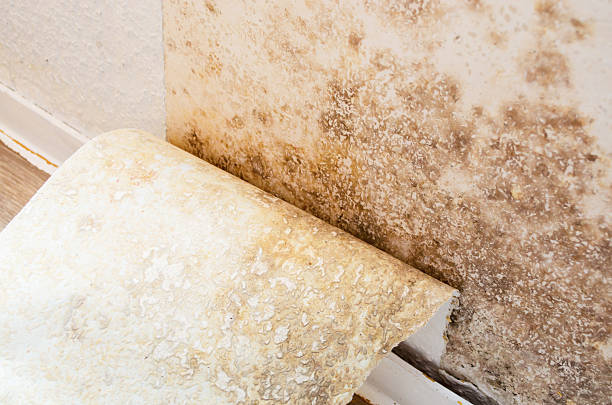
- Peeling paint or wallpaper: This can indicate trapped moisture behind surfaces.
- Health symptoms among occupants: Increased allergies, coughing, sneezing, asthma attacks, and skin irritation may suggest exposure to indoor mould.
If you notice any of these signs in your home or building, it’s time for immediate action.
Effective Solutions for Moisture Control and Mould Removal
- Inspect plumbing systems and patch leaks in pipes promptly.
- Repair roof damage causing water intrusion.
- Use exhaust fans in bathrooms and kitchens during activities like showering and cooking.
- Ensure vents lead outdoors rather than recirculating air indoors.
- Consider dehumidifiers in high-humidity areas such as basements.
- Aim to maintain indoor humidity between 30%–50%. Use a hygrometer to monitor levels.
- Seal windows properly during wet weather to reduce outdoor moisture infiltration.
- For minor infestations (less than 10 square feet), clean hard surfaces with soap and water followed by a disinfectant solution such as diluted bleach (1 cup bleach per gallon of water). Always wear personal protective equipment (PPE) during cleaning.
- For severe cases (greater than 10 square feet) or extensive structural contamination (e.g., within HVAC systems), consult professional remediation services.
Best Practices Table for Preventing Indoor Moisture Issues
| Problem | Prevention Strategy | Frequency |
| Leaky plumbing | Inspect pipes; replace damaged fixtures | Semi-annually |
| Poor bathroom ventilation | Install exhaust fans; leave doors open post-shower | Daily |
| Window condensation | Insulate windows; use storm-proof designs | Seasonally |
| High humidity | Run dehumidifiers; avoid air-drying clothes indoors | As needed |
By systematically addressing these issues with preventive strategies alongside proper clean-up techniques when necessary, you’ll not only mitigate existing problems but also safeguard your indoor spaces from future mould outbreaks.
Effective Mold Removal Florida: Identifying and Addressing Mould Growth in Your Home
Mould can develop in any indoor environment where moisture persists, making it essential to identify its presence early before it becomes a larger issue. Here’s how you can effectively pinpoint mould growth and assess its extent in your home.
Identifying Common Signs with a Mold Removal Company Florida
- Visible Discoloration: Look for black, green, or white patches on surfaces like walls, ceilings, and floors.
- Musty Odor: A strong, persistent earthy smell could indicate hidden mould.
- Warping or Staining: Bubbling paint, warped wooden surfaces, or water stains are warning signs of excess moisture that may promote mould.
- Health Symptoms: If household members experience unexplained allergic reactions (sneezing, coughing) or respiratory issues indoors, mould might be present.
Areas Prone to Mould Development
| Area | Potential Causes of Moisture |
| Bathrooms | Steam from hot showers and leaking pipes |
| Kitchens | Poor ventilation and water splashes near appliances |
| Basements | High humidity levels or leaks through foundations |
| Attics | Roof leaks or condensation due to poor insulation |
| Around Windows | Condensation build-up |
Steps for Detecting Hidden Mould
- Inspect Behind Surfaces: Check under carpets, behind wallpaper, and inside ventilation ducts.
- Use a Flashlight: Shine light on walls and ceilings at an angle to spot irregular textures or discolored patches.
- Monitor Humidity Levels: Use a hygrometer to detect elevated humidity (above 60%), which fosters mould growth.
- Listen for Complaints of Unusual Smell: A musty odor behind cabinets or inside crawl spaces may signal unseen mould colonies.
Tools for Comprehensive Inspection
- Flashlights for spotting difficult-to-see patches
- Hygrometers for monitoring indoor relative humidity
- Moisture meters to measure dampness levels within walls or floors
- DIY mould test kits (for areas where professional inspection is unavailable)
When You Need Professional Assessment
- You suspect extensive hidden growth but cannot locate it.
- The problem spans multiple rooms or structural components.
- There’s recurring visible growth despite cleaning efforts.
By understanding these signs and utilizing the right tools during inspections, you’ll be better equipped to assess the scope of any issue with indoor mould accurately. This awareness lays the groundwork for effective remediation strategies tailored specifically to your home’s needs.
Effective Mold Removal Services Florida: Identifying and Addressing Mould Growth in Your Home
Mould growth in your home can often go unnoticed until it becomes a significant issue. Identifying mould early is key to preventing further damage to your property and safeguarding the health of those living in the home. Below is a guide to help you efficiently identify mould presence and assess its extent.
Common Signs of Mould Growth
- Musty Odor: Persistent, earthy smells are often an indicator of hidden mould growth.
- Visible Discoloration: Dark spots or stains on walls, ceilings, or other surfaces that may appear green, black, white, or orange.
- Peeling Paint or Wallpaper: Moisture buildup behind walls can cause paint or wallpaper to bubble and peel.
- Water Damage: Leaks from plumbing fixtures, roofs, or windows can create conditions conducive to mould growth.
- Health Symptoms: Increased respiratory issues such as coughing, sneezing, or nasal congestion could indicate exposure to indoor mould.
Understanding Water Damage Restoration Florida and Mould Growth Risks
| Location | Potential Sources of Moisture |
| Bathrooms | Leaking pipes, unvented showers, condensation |
| Kitchens | Sink leaks, refrigerator drip pans |
| Basements | Groundwater seepage, poor ventilation |
| Attics | Roof leaks, inadequate insulation causing condensation |
| Laundry rooms | Washing machine overflows or improperly vented dryers |
Essential Tools for Mold Inspection Florida Homeowners Trust
- Moisture Meter: Helps detect damp areas within walls and floors where mould might be growing.
- Infrared Camera: Identifies temperature differences that may indicate hidden moisture.
- Mould Testing Kits: Collect samples for lab analysis if professional testing services are unavailable.
How to Assess the Extent of Mould Damage
- Check all corners of rooms with high humidity.
- Move furniture away from walls for hidden mold inspection.
- Create a small sketch of your home pinpointing visible affected regions.
- Estimate coverage size (e.g., small patches vs. entire wall sections).
- If the area exceeds 10 square feet (as per EPA guidelines), professional remediation is recommended.
- Seek expert advice for structural components like HVAC systems that may harbor unseen mould colonies.
When It’s Time to Call an Expert
- Large-scale infestations covering significant portions of walls or flooring.
- Recurring problems despite prior cleanup efforts suggesting ongoing moisture issues.
- Suspected toxic black mould (Stachybotrys chartarum), which poses heightened health risks.
Identifying the presence and extent of mould promptly reduces long-term risks while enabling effective remediation strategies tailored to your home’s specific needs. Use these techniques as part of regular maintenance practices in high-risk zones like bathrooms and basements for better indoor air quality year-round.
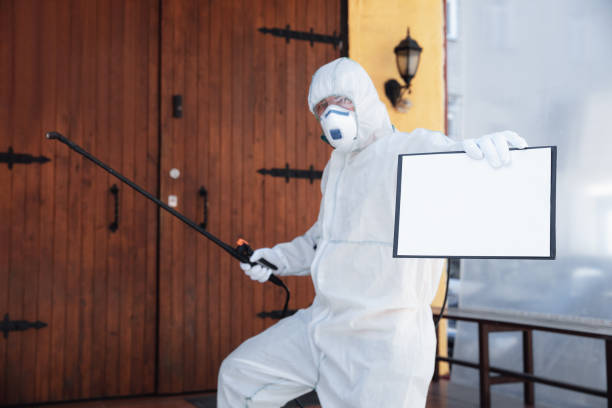
Essential Personal Protective Equipment for Safe Mould Removal
When dealing with mould removal, protecting yourself should be a top priority. Exposure to mould can lead to various health issues, including respiratory problems and skin irritation. To ensure your safety while addressing mould infestations, it’s crucial to equip yourself with the proper personal protective equipment (PPE). Below is a detailed guide on the essential PPE you will need and its importance.
Why Personal Protective Equipment is Necessary
Mould spores are microscopic and can easily become airborne during the removal process. Without adequate protection, these spores might be inhaled or come into contact with your skin, leading to potential health risks such as:
– Allergic reactions like sneezing, watery eyes, or rashes
– Respiratory issues such as coughing or wheezing
– Aggravation of asthma or other pre-existing lung conditions
Wearing PPE lowers the risk of exposure and ensures safer handling of contaminated areas.
Essential PPE for Mould Removal
- Purpose: Prevents inhalation of airborne mould spores and dust particles.
- Recommendation: Use an N95 respirator mask or higher-rated respirator (e.g., P100) for optimal protection. Avoid simple cloth masks as they are insufficient for filtering out fine particles.
- Purpose: Protects your hands from direct contact with mould, cleaning agents, and contaminated surfaces.
- Recommendation: Opt for non-porous gloves made from materials like nitrile, rubber, or neoprene rather than fabric ones that can absorb contaminants.
- Purpose: Shields your eyes from splashes of cleaning solutions and airborne spores.
- Recommendation: Choose goggles that create a seal around the eyes instead of standard safety glasses to prevent spore entry.
- Purpose: Prevents skin exposure to mould-contaminated surfaces or materials.
- Recommendation: Wear long-sleeved shirts and pants made from non-porous materials or disposable coveralls designed for hazardous environments (e.g., Tyvek suits). Dispose of or wash clothing after use.
- Purpose: Keeps feet dry and prevents tracking spores into clean areas.
- Recommendation: Use disposable shoe covers or waterproof boots that can be cleaned thoroughly after use.
- Purpose: Prevent contamination of hair with spores.
- Suggestion:** Use disposable caps if you’ll be working in heavily contaminated spaces.
Additional Tips for Using PPE Effectively
To ensure maximum effectiveness when using personal protective equipment during mould removal: – Inspect all gear before starting to ensure it is intact with no damage. – Replace disposable items like gloves and masks after each use. – Remove PPE carefully after work without touching any exposed surfaces on the contaminated side. – Wash reusable items thoroughly before storing them.
| PPE Item | Purpose | Recommendation | Reusability |
| Respirator Mask | Prevents inhalation | N95/P100 rated | Disposable |
| Gloves | Hand protection | Nitrile/rubber/neoprene | Disposable |
| Safety Goggles | Eye protection | Fully sealed | Reusable |
| Protective Clothing | Skin barrier | Non-porous/disposable coveralls | Disposable |
| Boot Covers/Boots | Foot safety & cleanliness | Waterproof/shoe covers | Both |
By equipping yourself properly with these essential items, you will create a safer environment not only for yourself but also reduce contamination risks during cleanup efforts.
Steps to Preparing Your Space for Effective Mould Cleanup
Thorough preparation is key to ensuring mould cleanup is both effective and safe. By properly setting up the area and taking the necessary precautions, you can minimize the risk of spreading mould spores and protect your health during the process. Below are essential steps to follow when preparing your space for mould removal.
1. Assess the Affected Area
Before starting any cleaning process, take these preparatory actions:
– Inspect the extent of the mould growth: Determine how widespread the problem is by checking walls, ceilings, floors, and hidden areas such as behind furniture or under carpets. – Identify moisture sources: Look for potential causes of dampness, such as leaks, condensation, or poor ventilation. Without addressing these issues, mould will likely return. – Measure safety concerns: If you find extensive mould covering an area larger than 10 square feet (around 1 square meter), consider consulting a professional.
2. Gather Required Tools and Materials
Having all necessary supplies ready in advance ensures a smoother cleaning process. Here’s what you’ll need:
– Cleaning solutions (commercial mould cleaners or DIY options like vinegar or hydrogen peroxide)
– Buckets, sponges, and brushes
– Heavy-duty garbage bags for disposing of contaminated materials
– Microfiber cloths for wiping surfaces
– Sealed plastic sheets or tarps to contain the work area
3. Protect Yourself with Personal Protective Equipment (PPE)
To avoid health risks associated with mould exposure, always wear appropriate safety gear:
– A N95 respirator mask to prevent inhalation of spores
– Non-permeable gloves such as nitrile or rubber gloves
– Safety goggles without ventilation holes to shield eyes from spores or chemical splashes
– Long-sleeved clothing that can be washed immediately after use
4. Isolate the Work Area
Preventing cross-contamination is critical during mould cleanup. Follow these isolation tips:
– Seal off doorways and vents using plastic sheeting secured with painter’s tape. This keeps spores from spreading to unaffected areas. – Shut down HVAC systems in the affected space temporarily so air circulation doesn’t disperse spores further. – Keep doors closed whenever possible during cleanup activities.
5. Remove Any Furniture or Items
To create a clutter-free working environment: 1. Move unaffected furniture and belongings out of the room if feasible. 2. For items that cannot be moved but may have minor contamination (e.g., upholstered furniture), cover them with plastic sheeting until they can be cleaned later.
6. Improve Ventilation While Working
Ensure adequate airflow during cleanup while preventing spore spread: – Open windows if weather permits but ensure that fans do not blow air from inside to outside directly. – Use exhaust fans vented outdoors if available but avoid circulating air indoors.
| Preparation Checklist | Completed? |
| Inspect affected areas | [ ] |
| Identify moisture source | [ ] |
| Gather cleaning tools | [ ] |
| Wear PPE | [ ] |
| Isolate work area | [ ] |
| Remove movable items | [ ] |
Properly preparing your space not only streamlines the removal process but also reduces health risks and prevents further contamination in your home environment.
- Effective Mold Remediation Florida Tips to Prevent Mold Growth in Your Home
- Comprehensive Guide to Mold Remediation Florida: Identifying and Solving Indoor Moisture Problems
- Mold Remediation Florida: Comprehensive Services and Resources for Safe and Effective Mold Removal
- Effective Mold Removal Florida: A Step-by-Step Guide to Remediation
- Comprehensive Guide to Mold Remediation Florida Homes Need
- What to Expect from Mold Removal Services Florida and How Professionals Handle the Process
- 6 Steps to Comprehensive Mold Remediation in Florida
- Comprehensive Guide for Mold Removal Florida Residents Can Trust
- Effective Mold Removal Florida: Key Steps and Professional Techniques